Download for your Windows
In this digital age, understanding and effectively utilizing residential proxies has become an essential skill. Whether you're new to this field or looking to refine your expertise, this article will provide a detailed walkthrough, starting from the point of purchase all the way to application. Here, we demystify the concepts of IP sourcing, authorization users, IP rotation modes, and effective testing of your proxy environment. Join us as we delve into these techniques, providing you with the essential knowledge and skills needed to master the use of dynamic residential proxies. Let's embark on this enlightening journey together!
Please allow us to introduce to you the detailed usage method of the dynamic rotating residential proxy. After you purchase the traffic plan, click on Get Proxies.
First, how to obtain and use proxies in API-Whitelist/Allowlist mode:
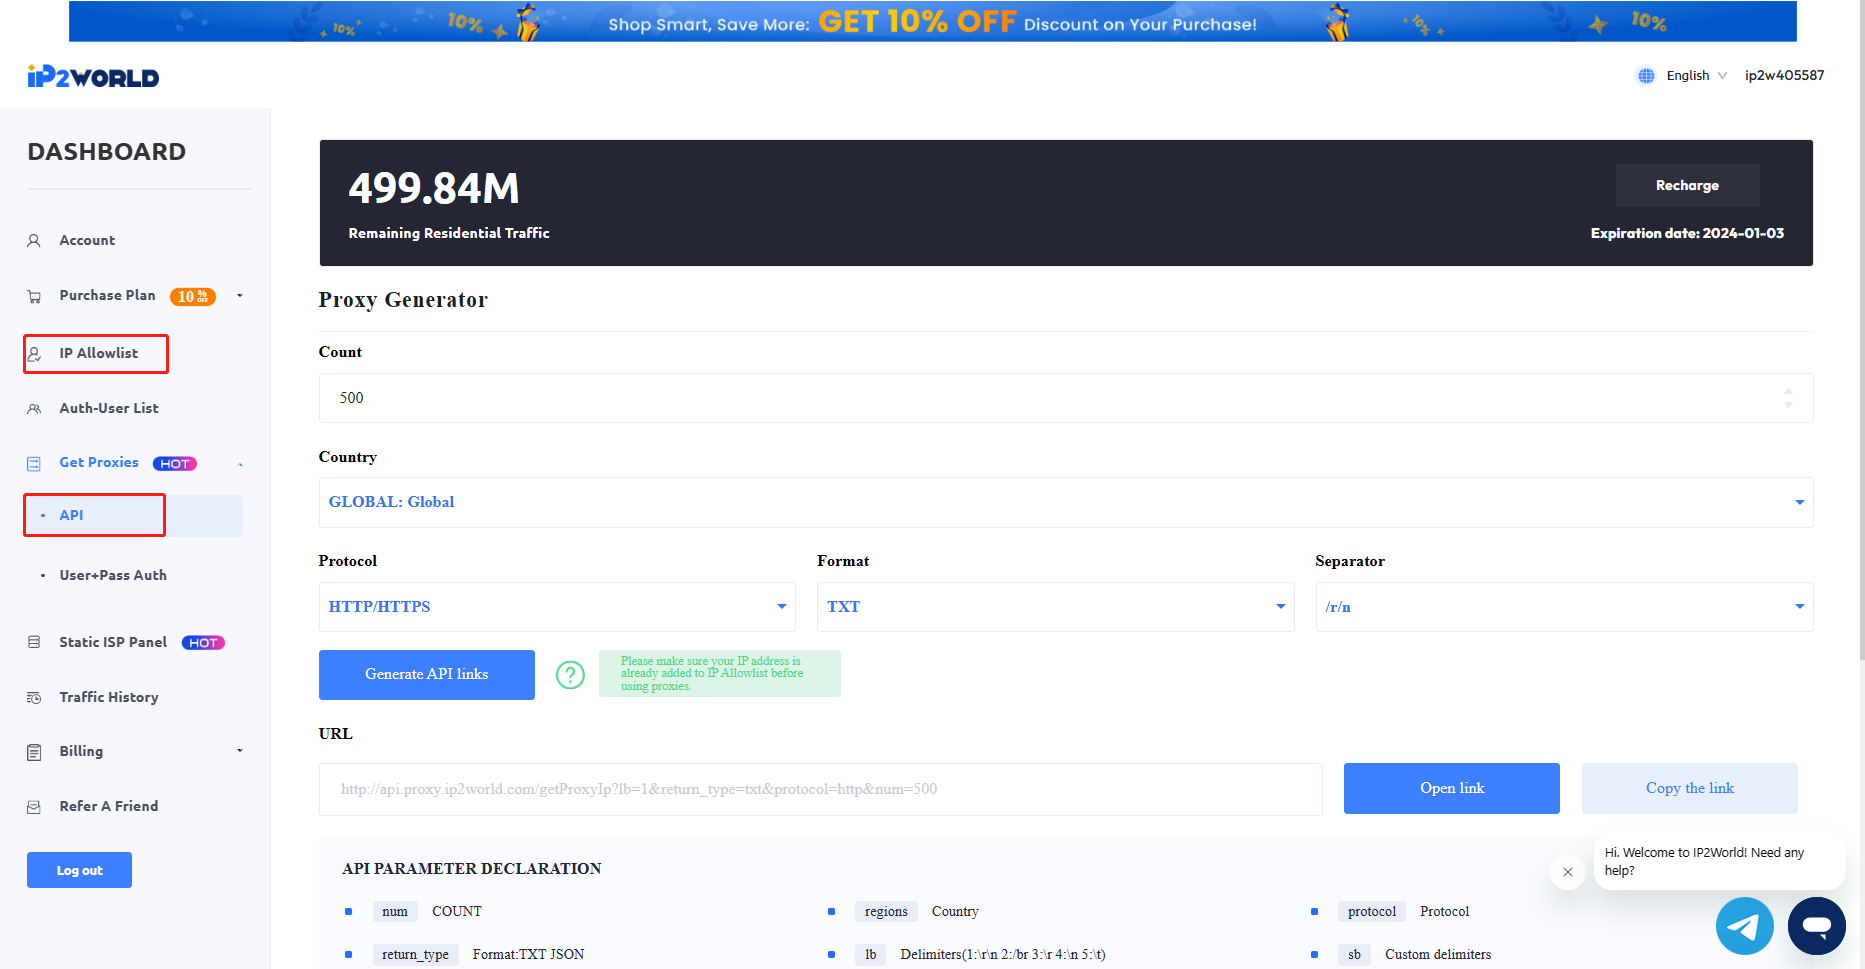
The API mode offers national-level location targeting, supporting the selection of HTTP(S), SOCKS5.
When you click to generate the API link, it will prompt you to add the current IP to the whitelist/allowlist, click confirm.
If other devices with different IP need to use the API mode proxy, please add the IP address in the IP Allowlist before using it.
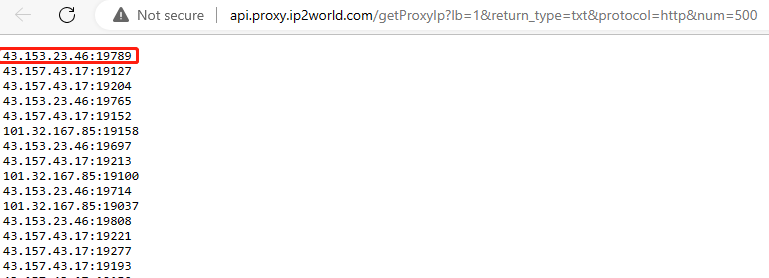
Clicking open link will generate a proxy list. Copy one of them and paste the IP:port into the anti-detect browser to test the IP connectivity.
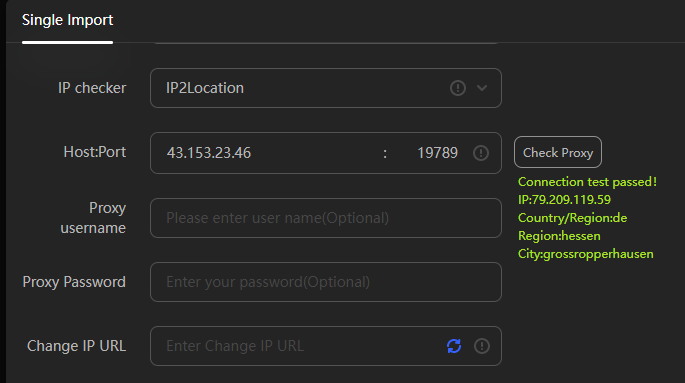
Proxy successful!
Points to note:
· In API mode, the IP will automatically switch, changing with each request. At the same time, the default automatic switch time for each IP is 5 minutes.
· You can flexibly apply the API link to other applications or script codes. For instance, in the following anti-detect browser configuration, the API can directly adapt to the anti-detect browser. When applying, input the quantity as 1.
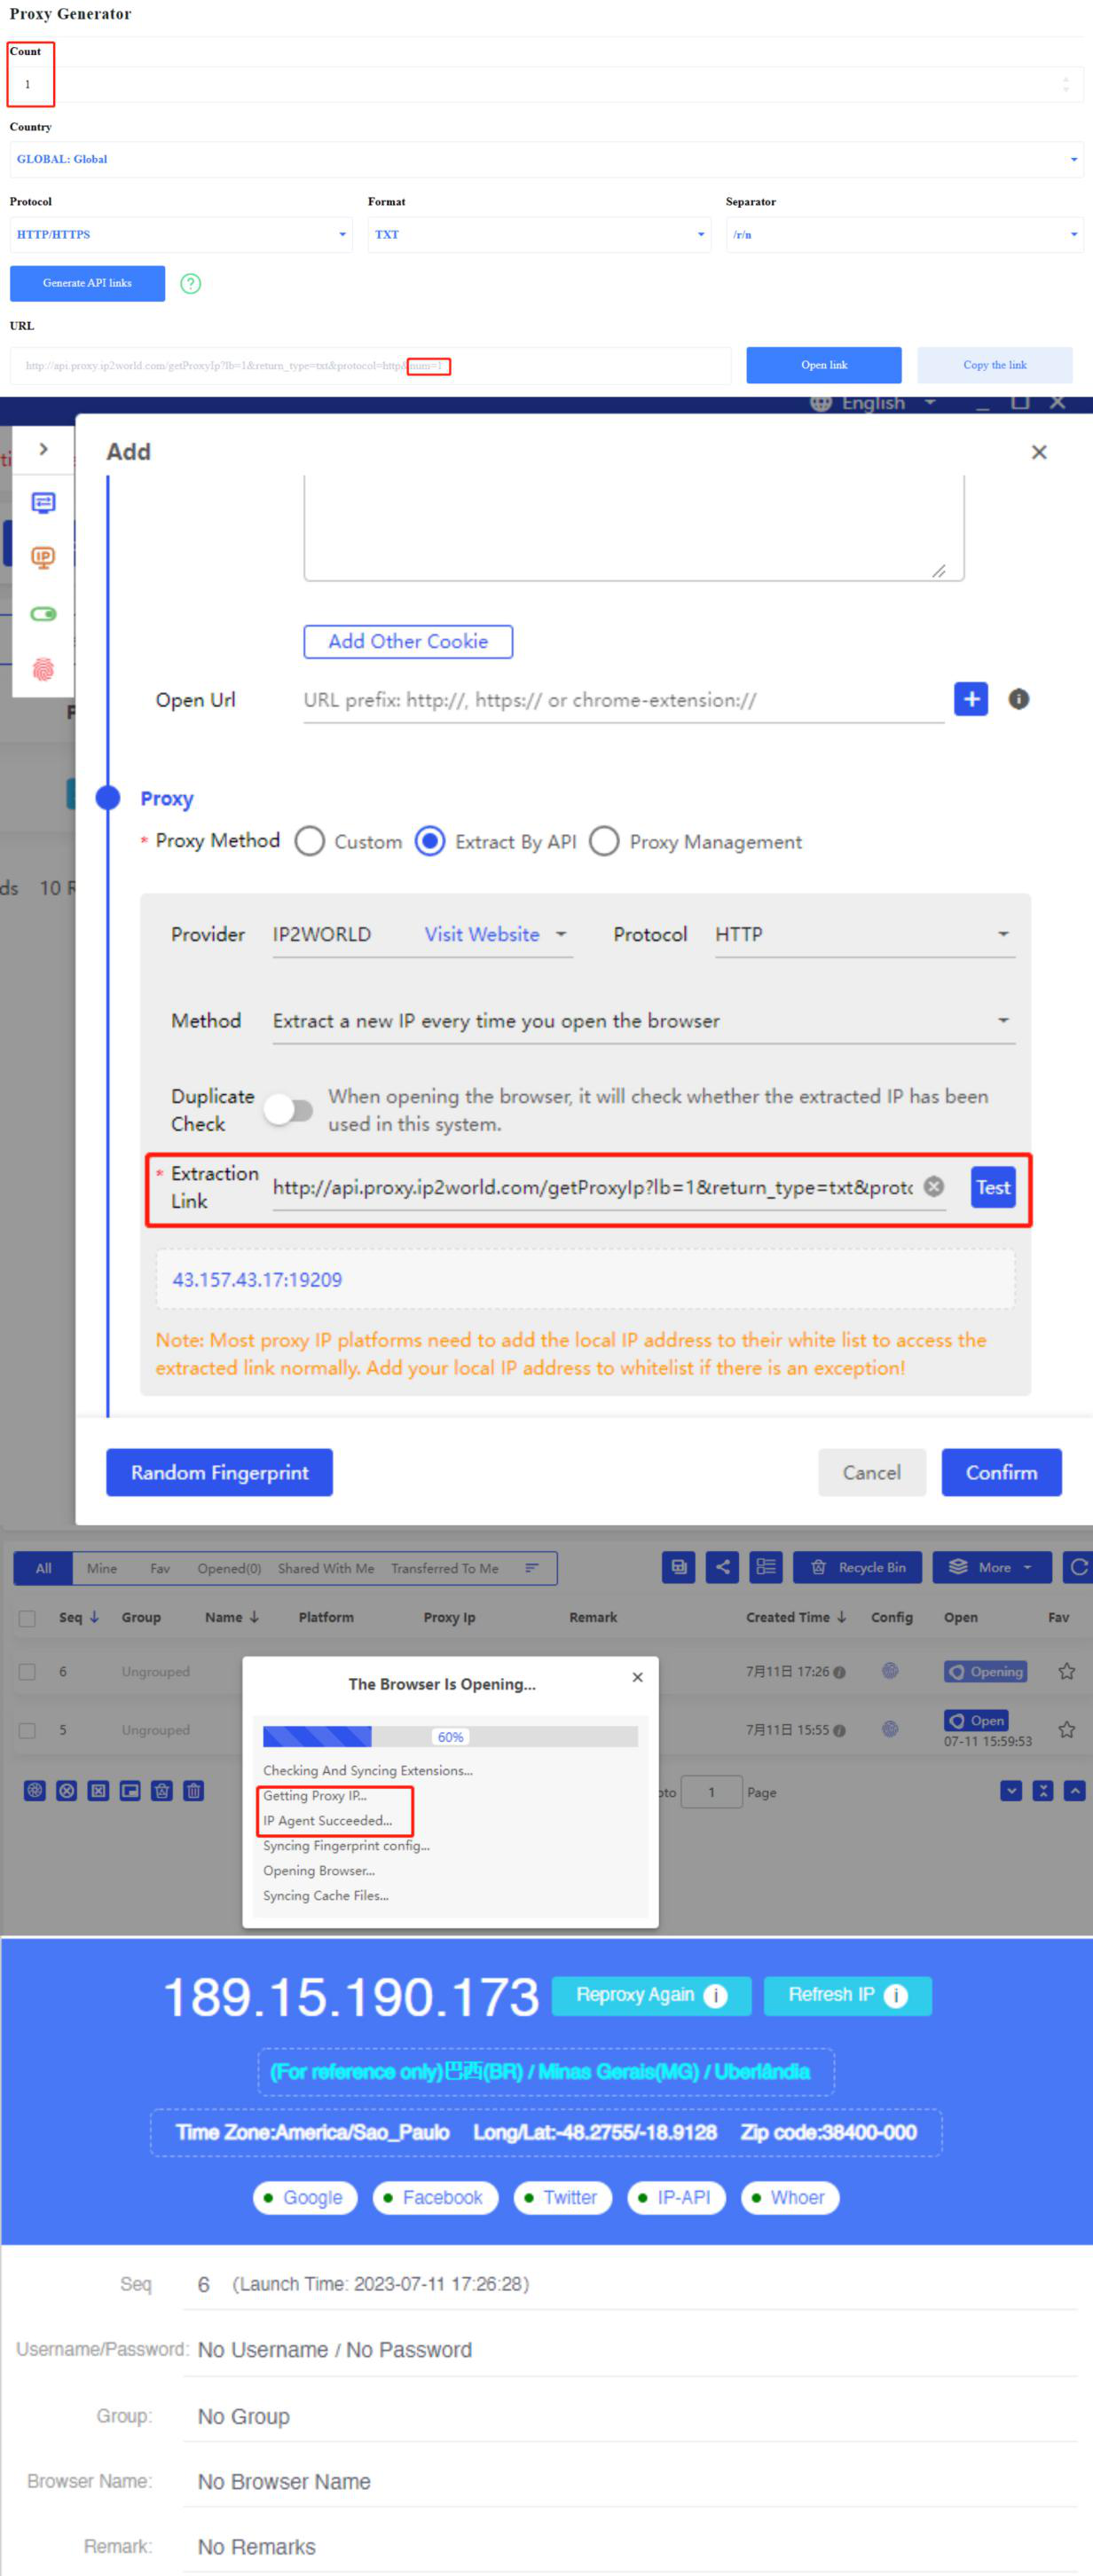
The adaptation of the API extraction proxy with the anti-detect browser is successful!
Username+Password Authentication
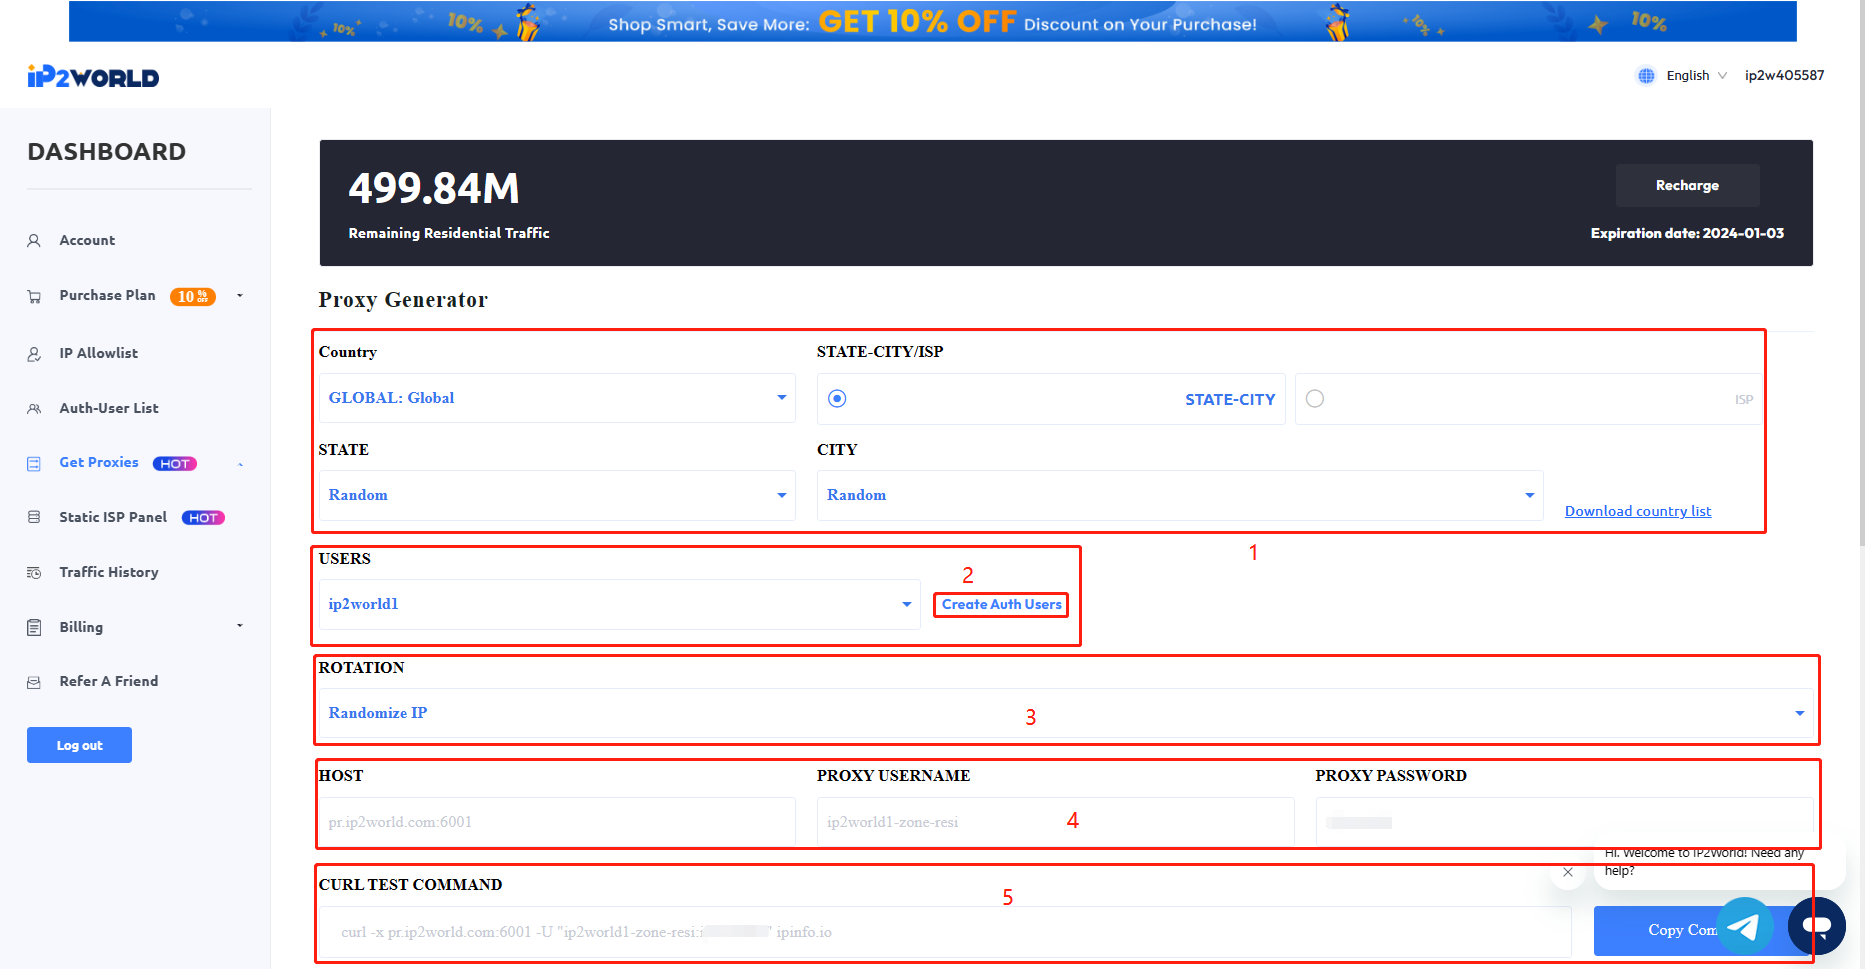
1 Choose your proxy IP settings in this area, supporting selection by country, state, city or country, ISP level.
2 Select the authorized user you need to use here. The authorized account will be used to generate proxy information, creating an authorized account is an essential step in password authentication mode.
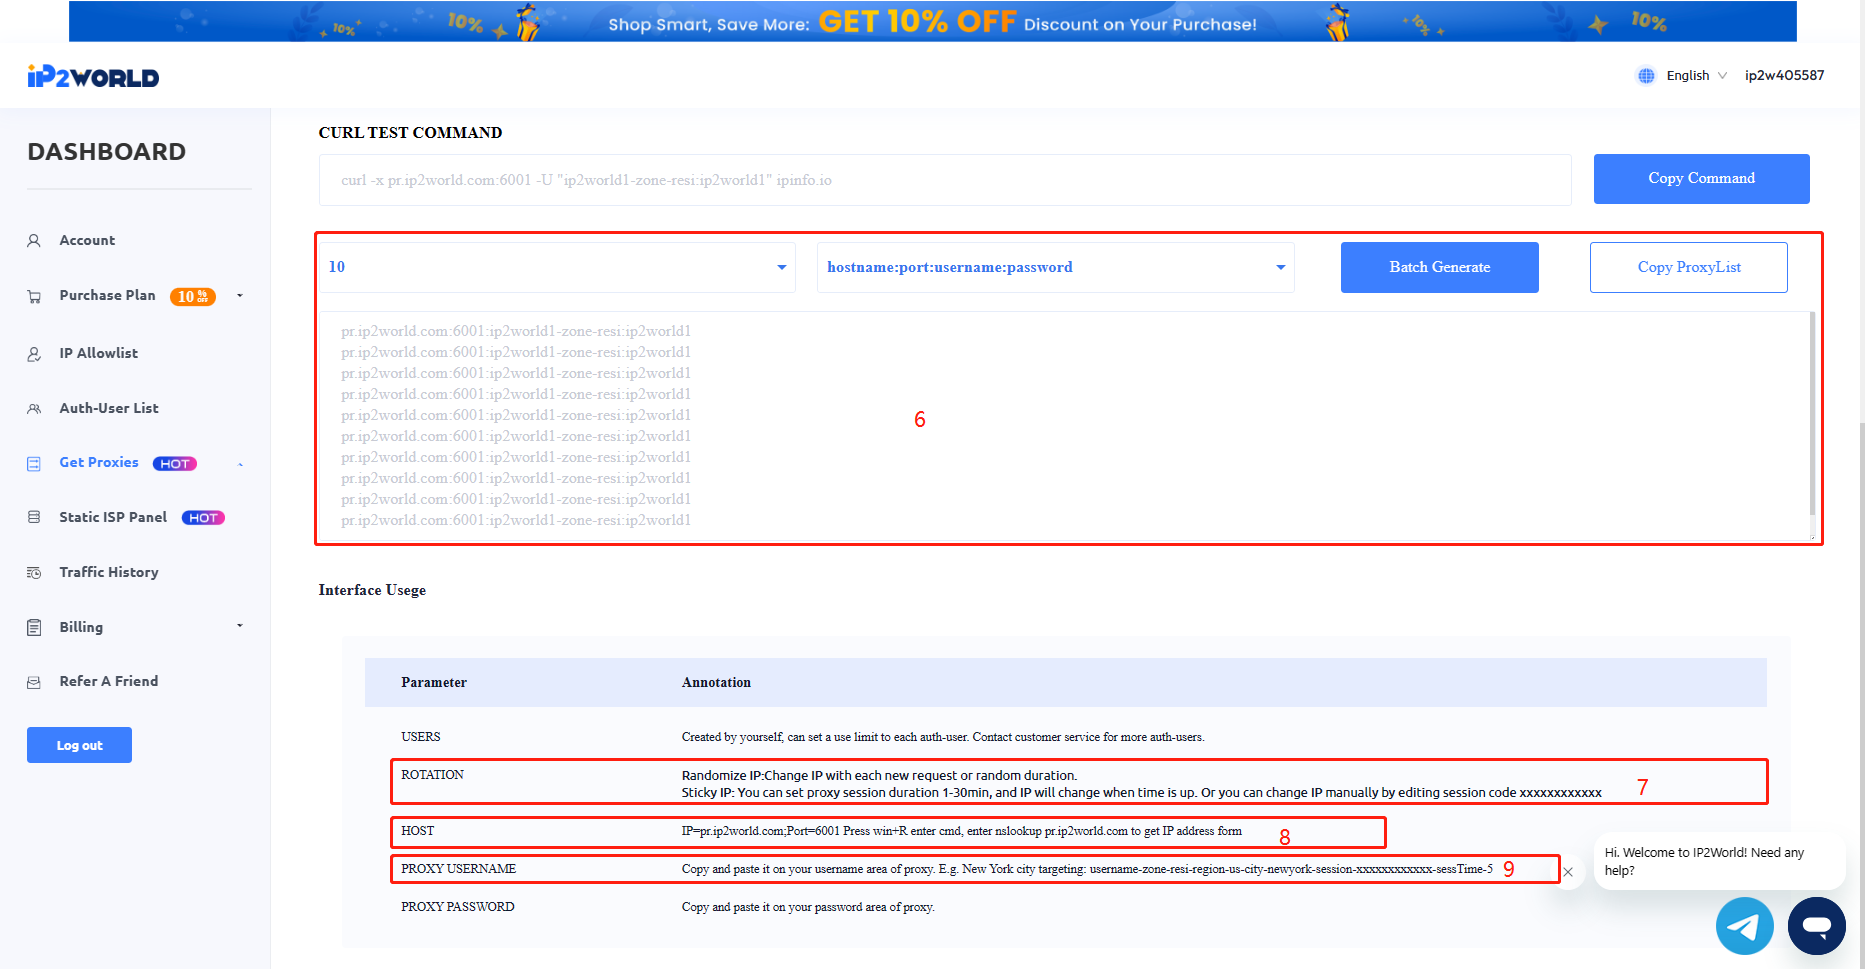
3/7 Choose the IP rotation mode here. You can choose the random IP mode or sticky IP mode. In the random IP mode, the proxy will change the IP with each new connection request or at random intervals. In the sticky IP mode, you can set the session duration of the proxy to 1-30 minutes. When the duration ends, the IP will automatically switch or you can manually change the IP by editing the session code.
4/9 This is the most important information you need when applying the proxy, it is basically used in various scenarios.
5 This is your CURL test command. You can use this command to test whether the current environment is applicable and test the connectivity of the current proxy. Only when the CURL command tests out the IP information can it prove that your current network environment and IP proxy are normally available.
6 This is the area for batch generation of proxy lists. You can choose the order of IP:PORT:USERNAME:PASSWORD, directly copy the generated result and paste it on the program where you need to apply the proxy, which is convenient and quick. At the same time, in the delayed IP mode, this batch generation function will automatically randomly generate session characters for you, and each line is a different IP.
8 IP=pr.ip2world.com; Port=6001 Press Win+R to enter cmd, enter nslookup pr.ip2world.com to get the IP address format. Here you can query the current IP address form under the main domain. After finding the IP address, it can replace the domain form to use the proxy.
In conclusion, navigating through the IP2World’s dynamic rotating residential proxies doesn't have to be daunting. With a careful understanding of their operation, from purchase to application, users can maximize the potential of these tools. By observing the proper steps of using API whitelist/allowlist mode and adopting the right IP rotation modes, we can truly harness the power of proxies. Always remember to verify your environment and proxy connectivity using the CURL command, and utilize the one request one IP switch function for efficiency. With these in place, rest assured, your journey to achieving a successful and smooth proxy experience will be within reach.