IP2 Proxy Manager
Fixed port forwarding Settings
1.Start IP2 Proxy Manager
Detailed information on the top:
① Still Have - Remaining IP amount
② Local Proxy - Indicates the local Proxy address
③ Local IP - Indicates the local IP address
④ Account Information - Account username information
Tips: Please use IP2World Proxy Manager in non-mainland Chinese


2. Log in to the IP2World proxy account and click "open" to get the proxy list
Support to select country/state/city Click "Refresh" to specify the proxy list


3. Right-click an IP address, click "Forward Port To Proxy", and select a port

4. IP Successfully bound, IP goes to “TodayList”, support clicking to rebind port
click “PortForwardList” check detailed proxy parameter


5. After the IP is bound to the port, you can configure the proxy to use
Proxy address: 127.0.0.1:40002 (IP:Port)
The export IP is: 64.18.254.84
6. We take the AdsPower browser as an example to configure the proxy
Click "New Profile" to create a new browser - Proxy type select "SOCKS5", enter the local proxy address and port - configure successfully, running browser, view the assigned proxy


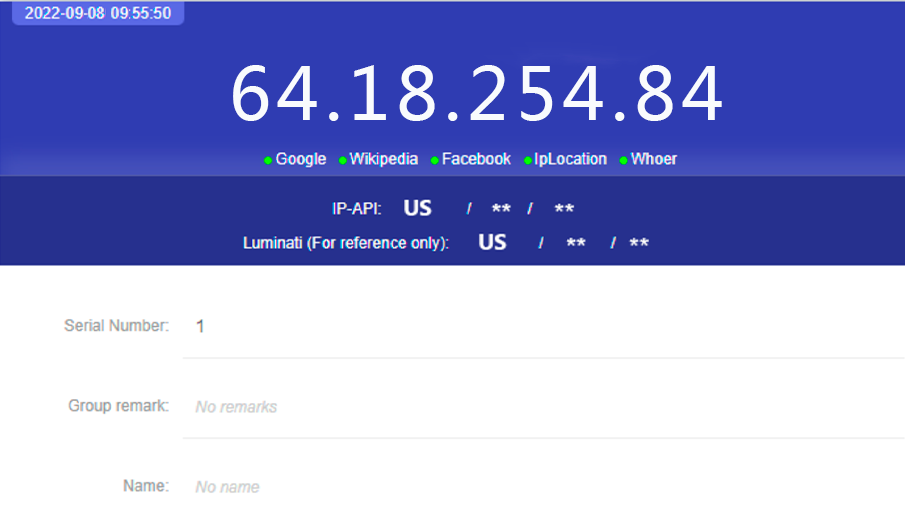
7. If you need to change the IP address of another country, re-select the country/state/city, click the refresh button to get the corresponding proxy list, and repeat the above operations

Multiple port forwarding Settings
If you open multiple fingerprint browsers, you only need to configure multiple ports. Enter the local IP and port in the proxy settings of each newly created "Fingerprint Browser".
*The corresponding port value (check in PortForwardList), you can complete the setting.

Global Proxy
Windows PC
IP2World Proxy Manager has to use on full global internet environment, even part is global still cannot work.
If you cannot connect to proxy on other software or browsers, please check your internet environment or use windows settings→internet proxy→manual proxy to test. Shown below:
Windows Internet Proxy

Step 1
Configure the IP2 Proxy Manager(In this example, 10.2.0.6 is PC's IPv4)

Step 2
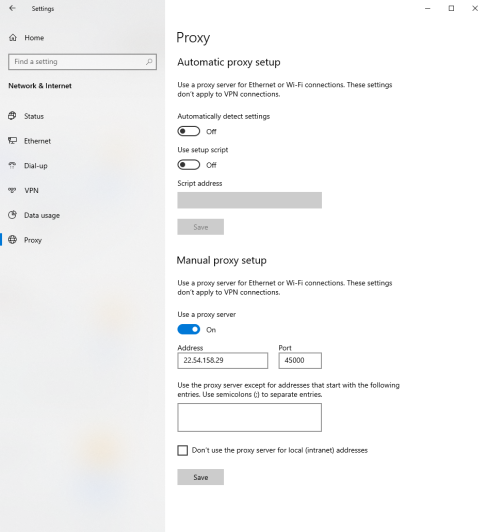
Windows settings→Internet proxy→Manual proxy
Input PC's IPv4 and the port you bind, then click Save

Step 3
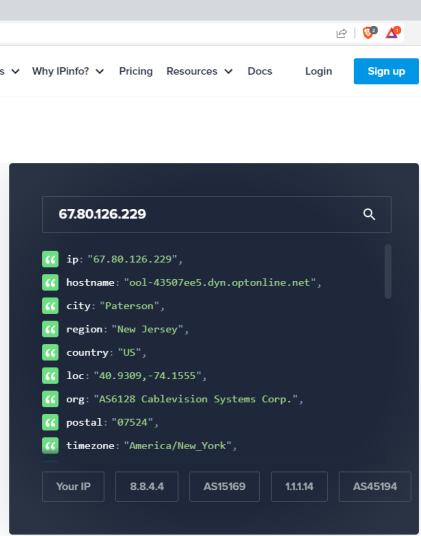
Use an IP address website to test the present IP address
Note: If you cannot connect to a browser, try to turn off the internet proxy and STOP the IP2 Proxy. Then OPEN IP2 Proxy and turn on the Internet Proxy. And reconnect to the browser.

If other problems occurs, close the proxy manager by right-click the icon and exit then retry the above process.
If still cannot connect, contact customer service.
Android Devices
Note:Your mobile device should connect to the same Wifi of your PC(which already download ,configure and open IP2 Proxy Manager well), both mobile and PC must be in the same Internet environment(Means that they must have the same Local IP Shown on IP2 Proxy)

Step 1
Press the connected Wifi, choose modify network

Step 2
Press Proxy, and choose Manual.

Step 3
Input PC's IPv4(Shown on IP2 Proxy Manager's Local Proxy, or you can find PC's IPv4 by win+R→cmd→ipconfig) on Hostname
and input the port you selected in IP2 Proxy Manager on Port area.
IOS Devices
Note:Your mobile device should connect to the same Wifi of your PC(which already download and configure IP2 Proxy Manager well), both mobile and PC must be in the same Internet environment(Means that they must have the same Local IP Shown on IP2 Proxy)

Step 1
Download and install Shadowrocket


Step 2
Click + , choose the type of SOCKS5, input PC's IPv4(Shown on IP2 Proxy Manager's Local Proxy, or you can find PC's IPv4 by win+R→cmd→ipconfig) and the port you bound in IP2 Proxy Manager(In this example image the port is 40000)
MacOS PC
How to install IP2World Proxy on MacOS?
Please note that before installing IP2 S5 Manager, please set your security and privacy status to accept downloads from anywhere.
Step 1
Download the IP2World S5 Manager.
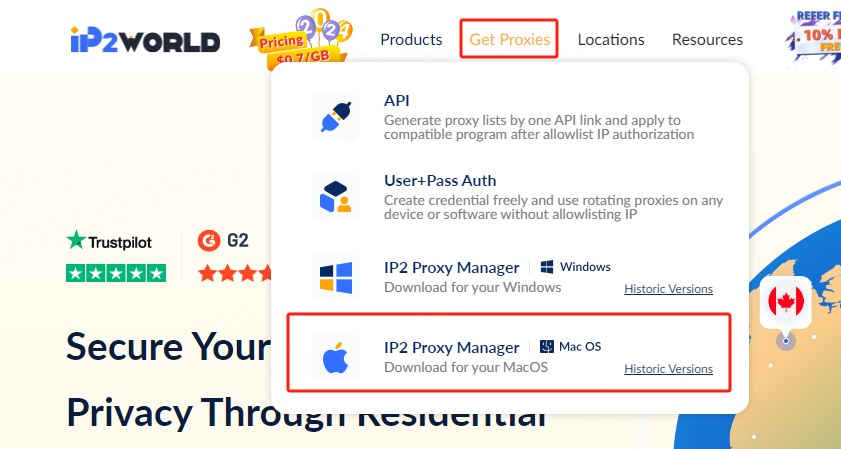
Step 2
Installing IP2 S5 Manager.
The following problems may occur during installation:
Q: “IP2 S5 Manager” can't be opened because Apple cannot check it for malicious software.
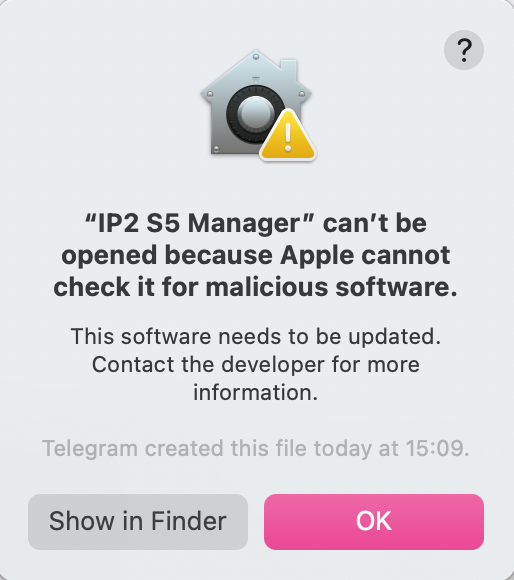
Click OK, then open your Systerm Settings, click Privacy & Security, then click Open Anyway or Anywhere.
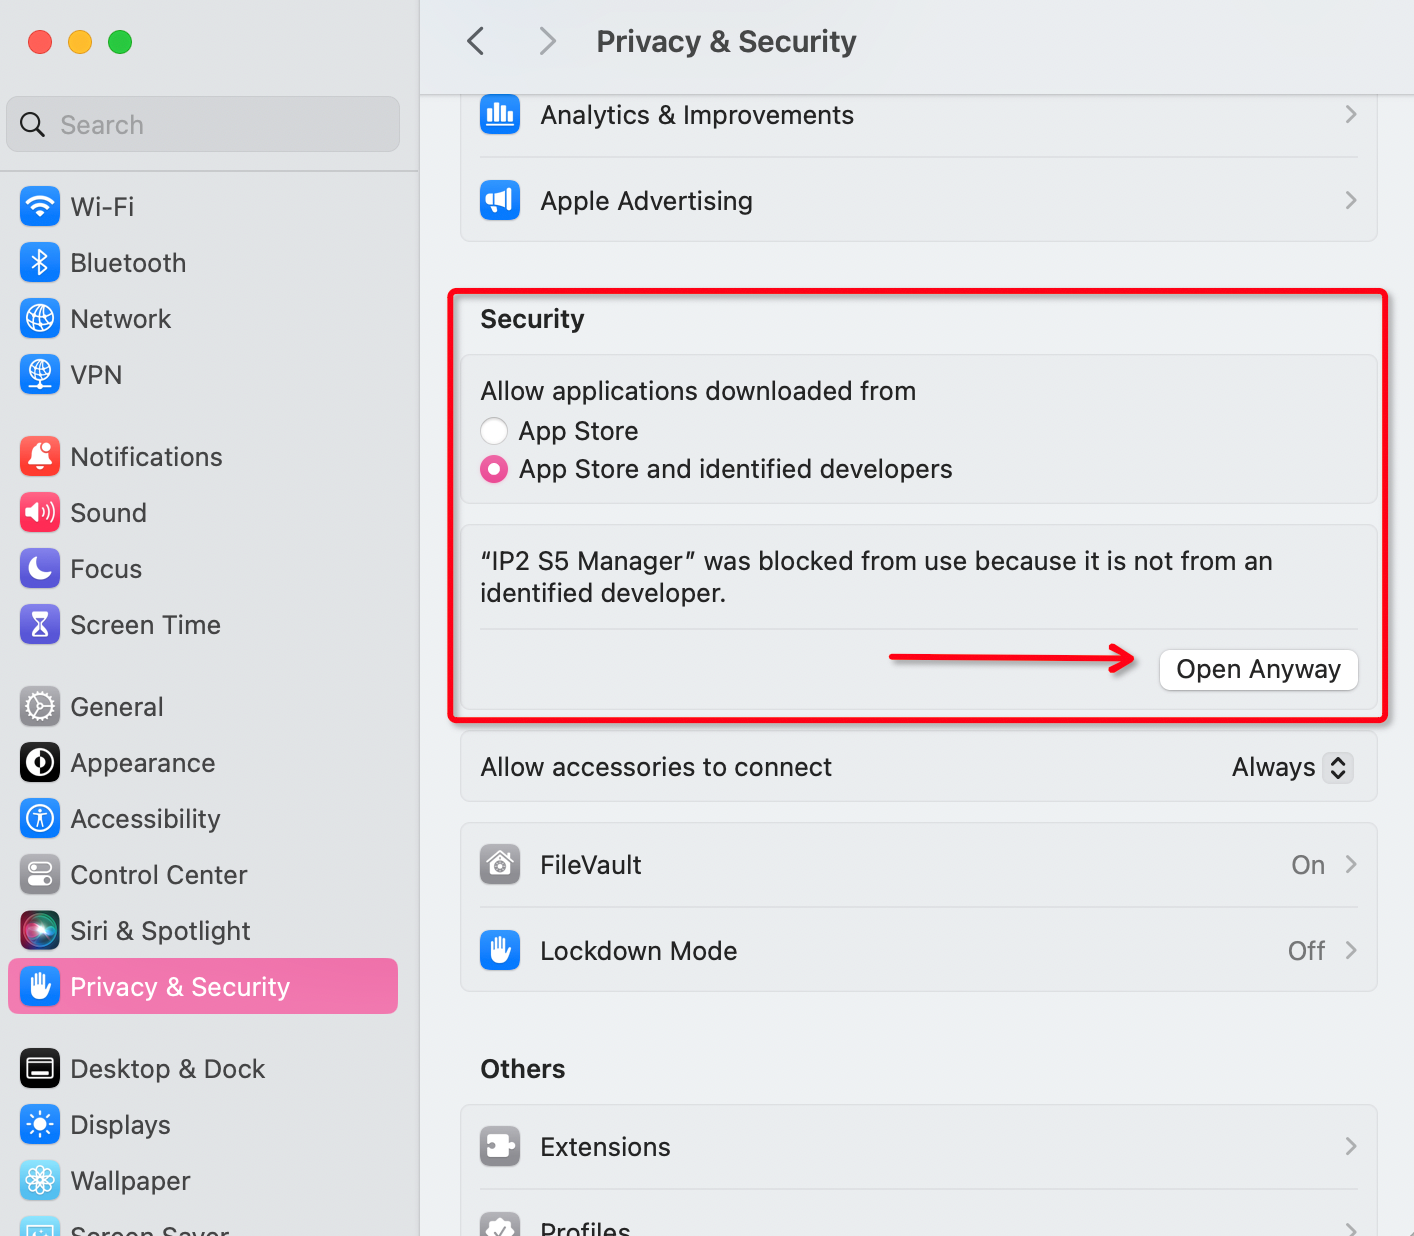
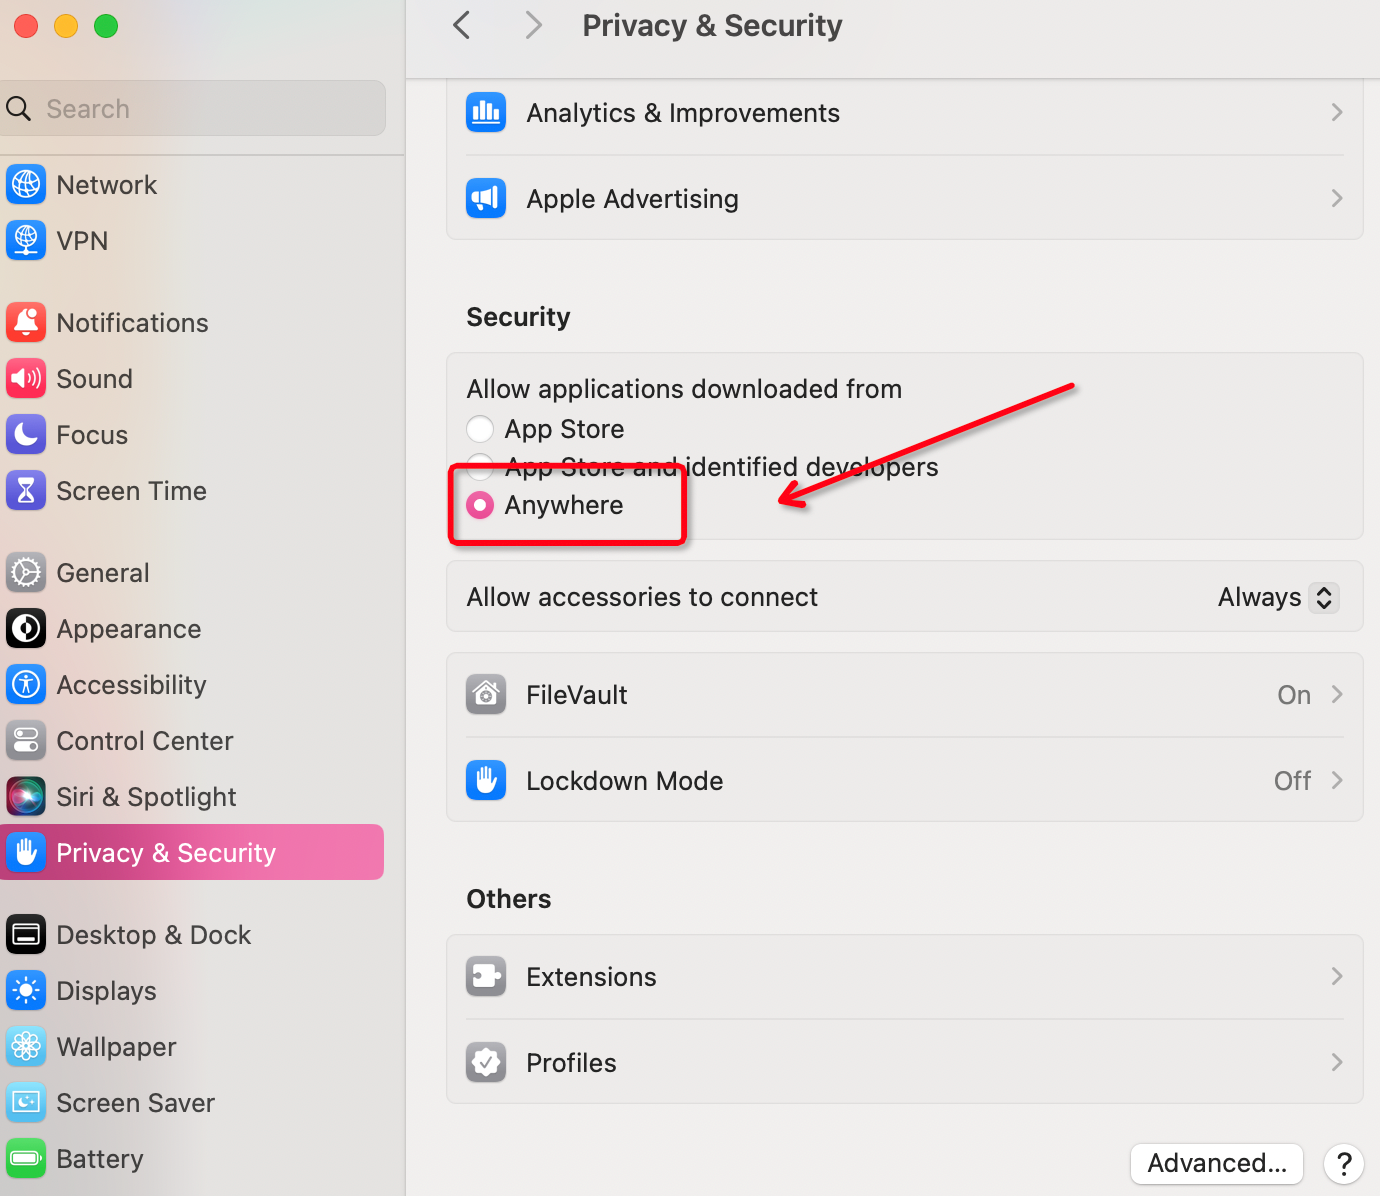
Q:Can't find Anywhere in Privacy & Security?
A:Open a terminal and enter the command: sudo spctl -master-disable, then just click Return, enter your password and click Return again.
Step 3
Open IP2 S5 Manger, use your proxy.
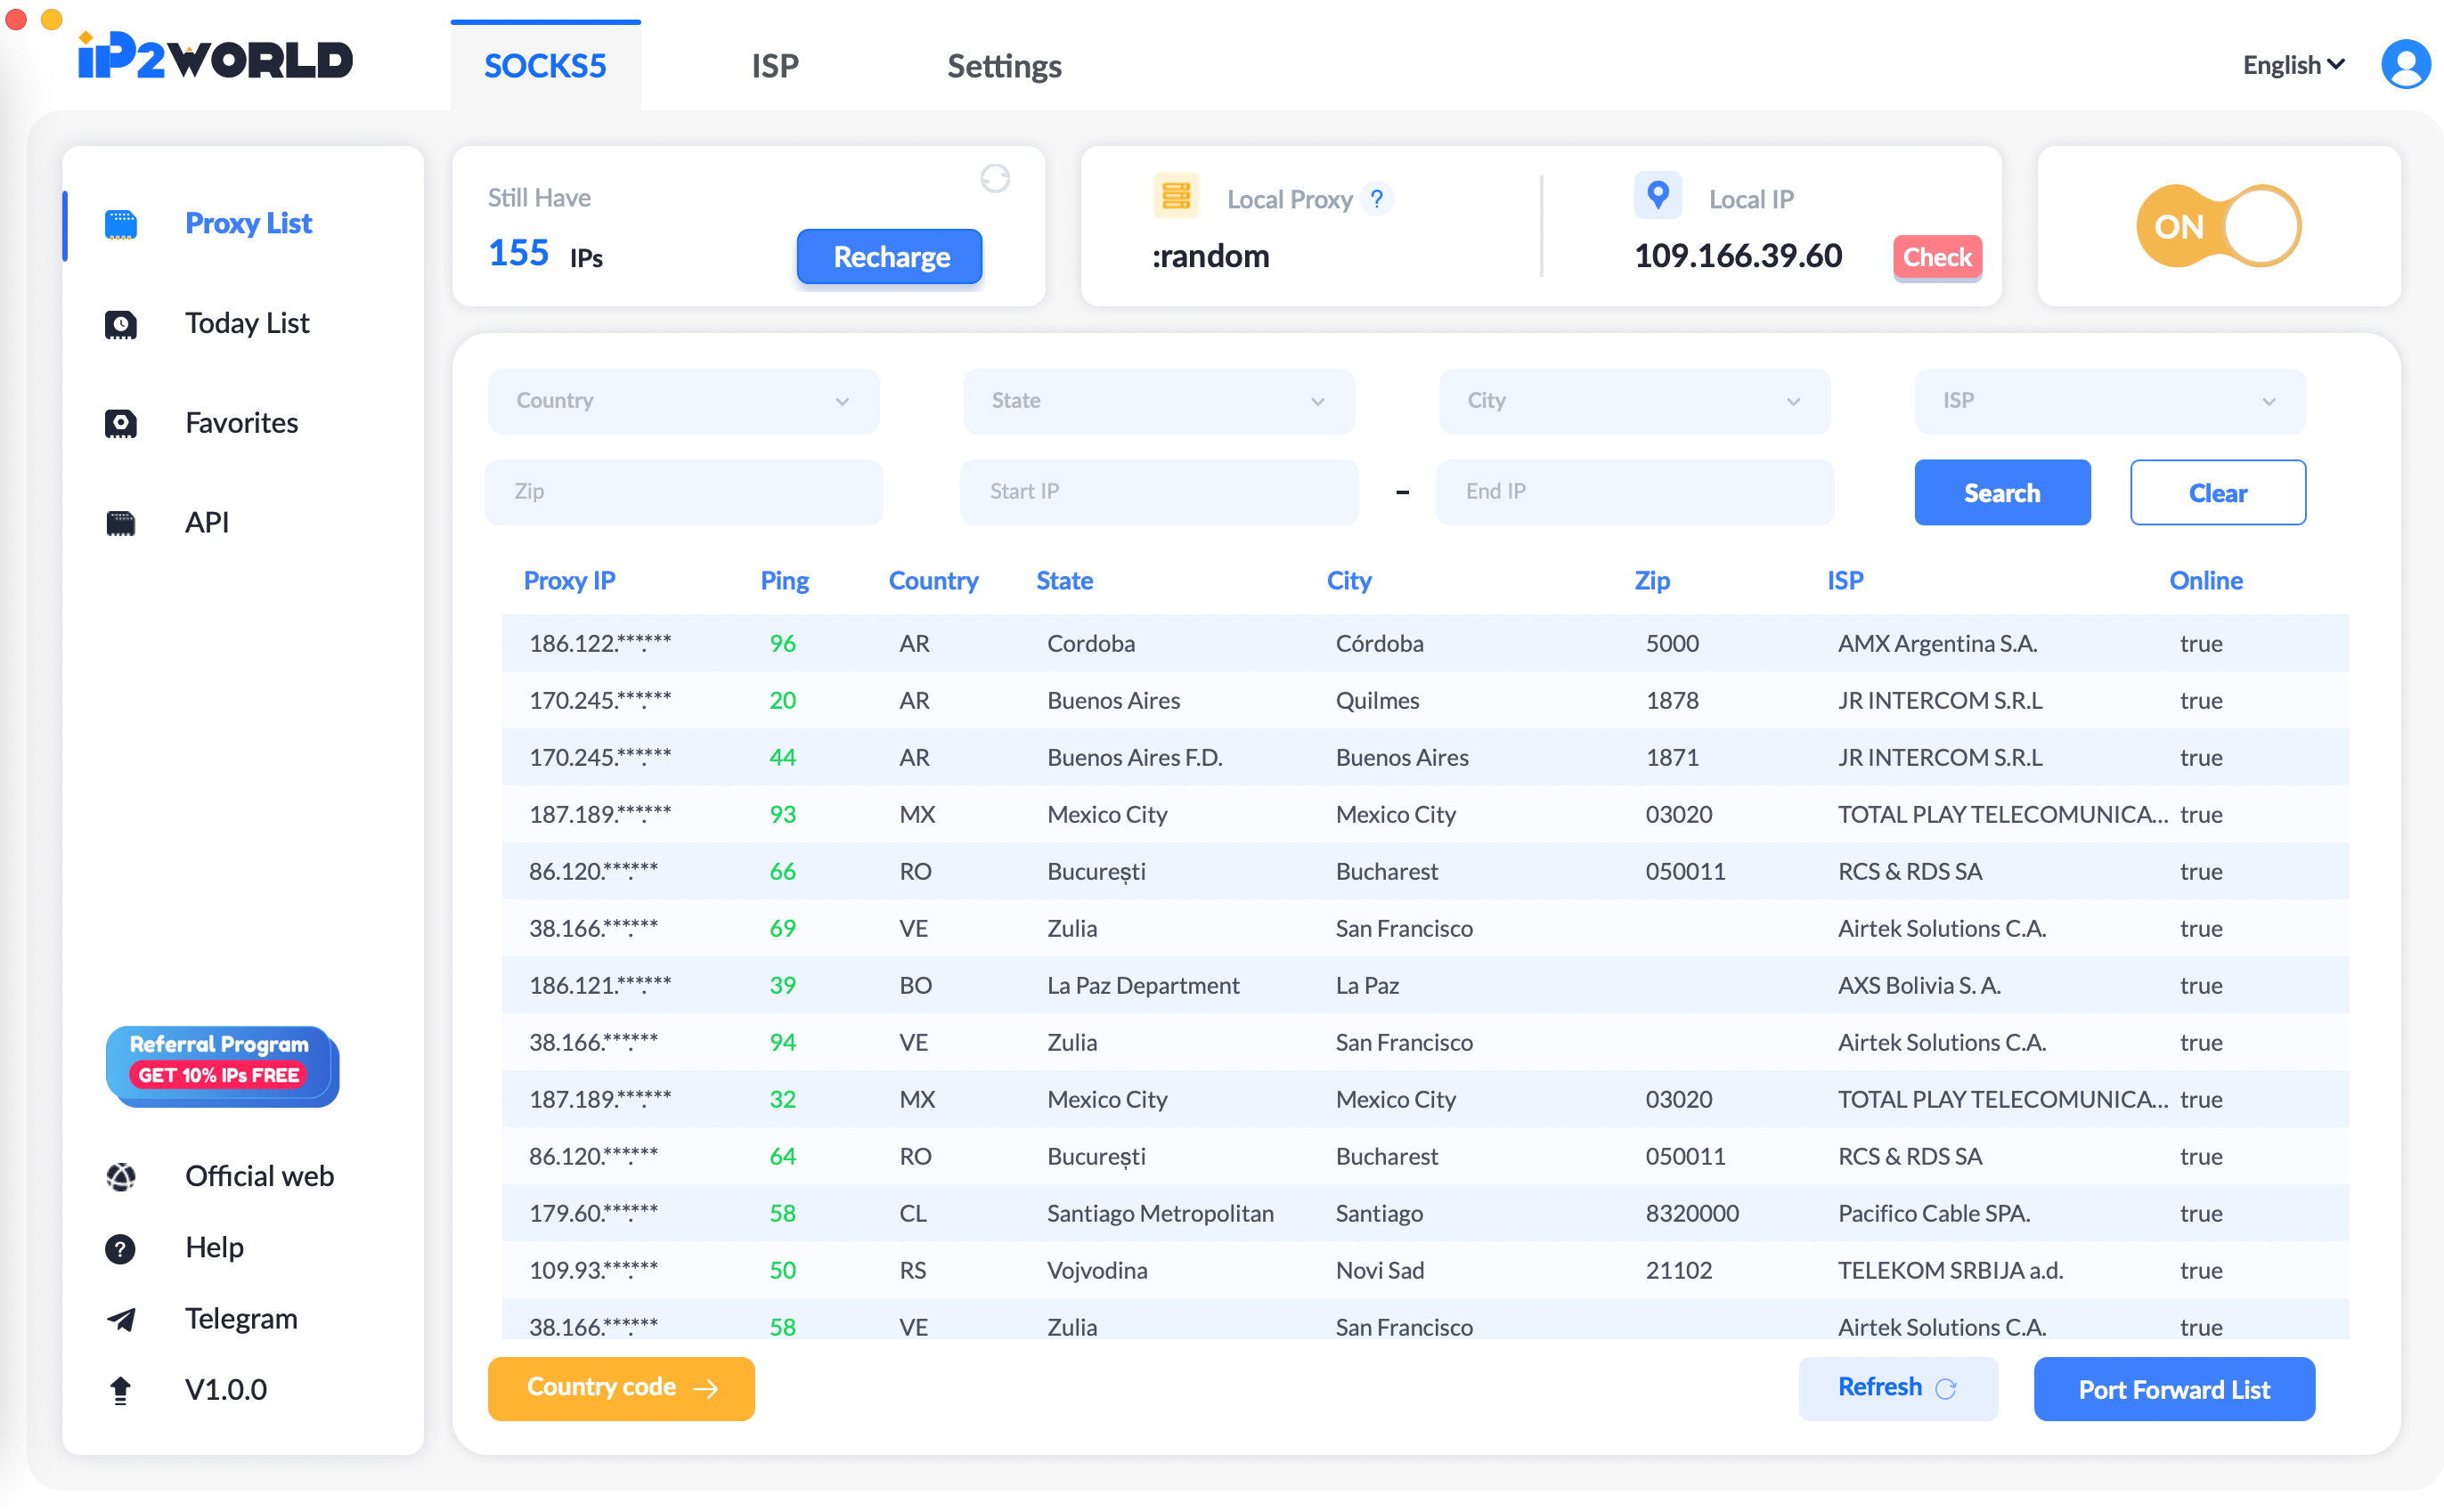
Proxy Settings
SOCKS5 Proxies Settings
1.General API Proxy
Note:
The IP amount will be deducted from account balance once the proxy generated. Just use the port displayed in your current device.
Example(What does proxy generated mean?):
Once you put the API link on the URL field and press enter or click search, or put the API Link in other software/script and run the automatic program, the proxy is already generated. And the according amount IP is already deducted.
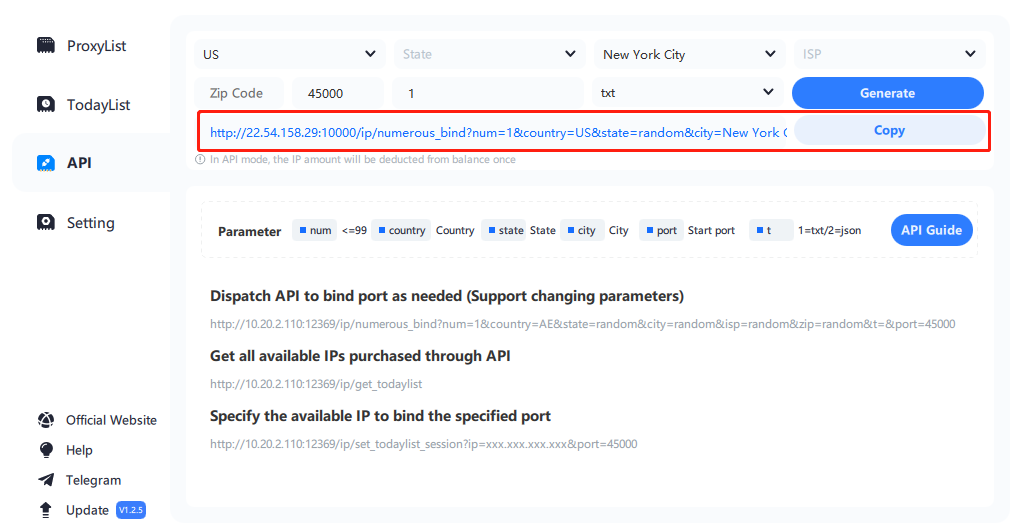
Preparation:
Open IP2 Proxy Manager, Internet Proxy and a browser with a website to detect IP. And start the IP2 Proxy Manager.
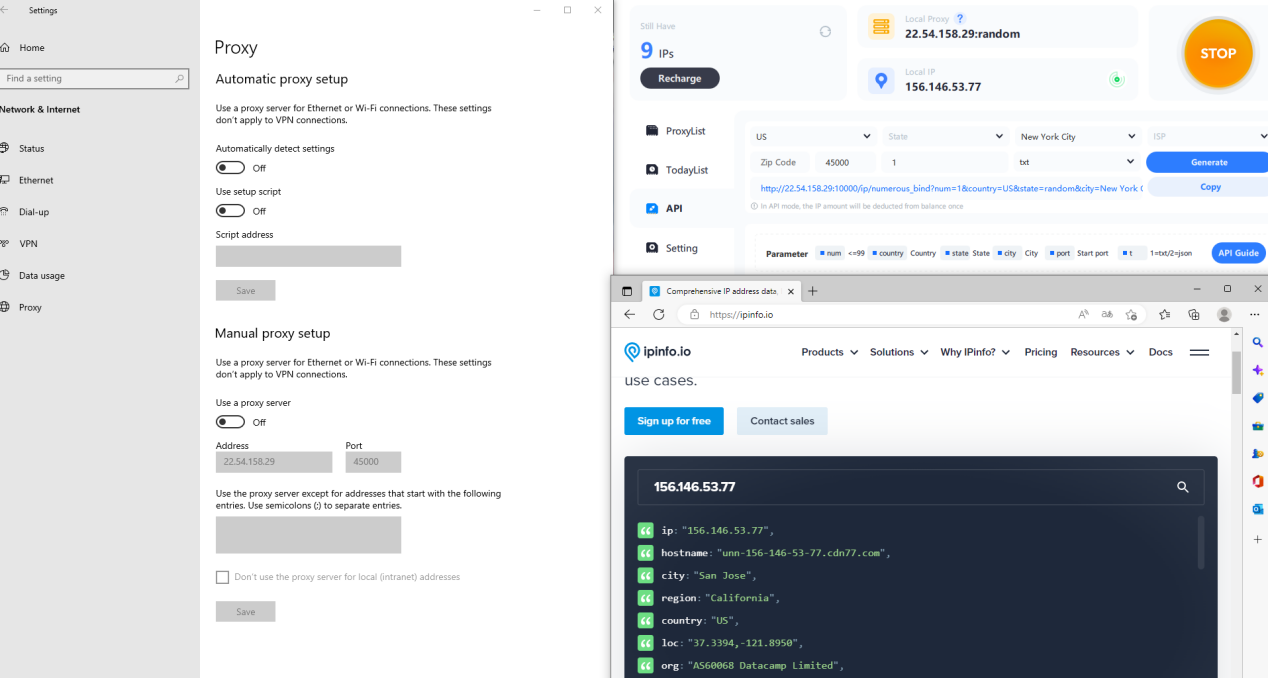
Step 1: Start and check the status of the proxy and the global international internet environment is normal.
First, bind an IP: port from the proxy pool (ProxyList) according to the normal proxy process, and then apply an IP from the todaylist. When the screen displays as follows, the proxy is successful, which means that your current proxy and internet environment are both in normal status. Otherwise, please check your global international environment or change to a new IP.
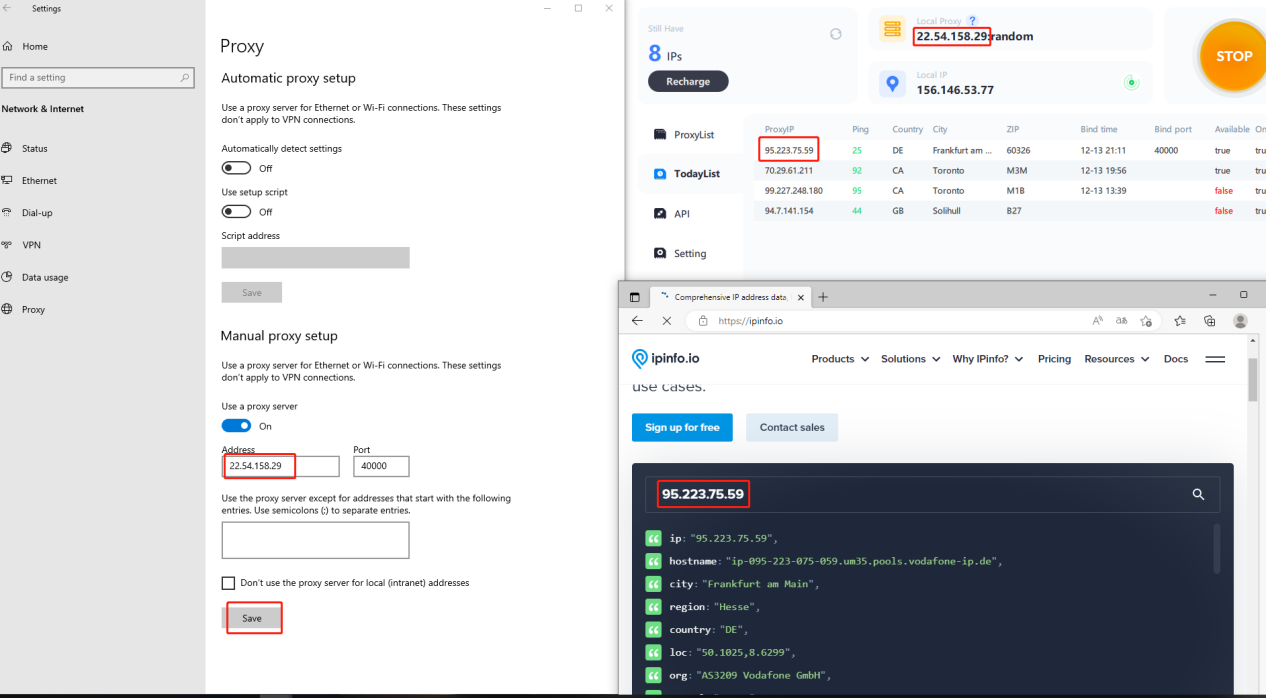
Step 2: Start the API mode to generate proxy
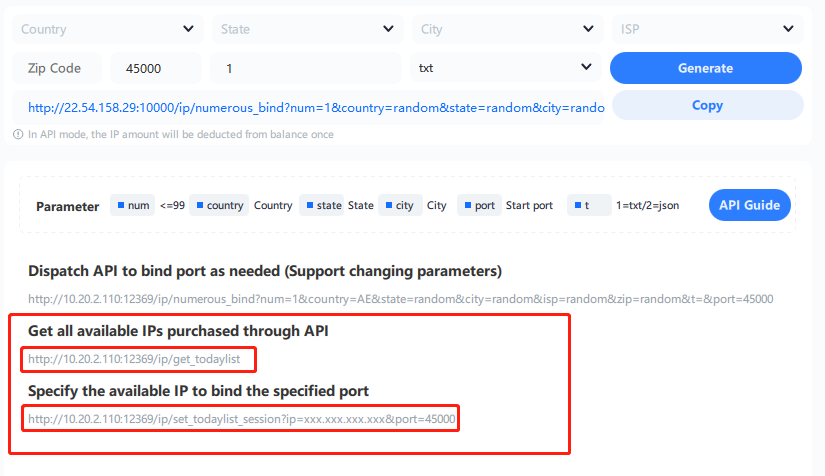
First select the proxy pool where the proxy is located, support selection of country (US), city (New York City), ISP, ZIP and other filter conditions, and then determine the starting port and generate the proxy Quantity (1) (in general, fill in 1 for the quantity, unless you are sure to bind multiple proxies at the same time), click Generate and Copy. Paste the API link into a new page of the browser, press Enter, and when the page is refreshed successfully, the proxy has been successfully generated. At this time, change the port in the internet proxy to the 45000, click Save, refresh the IP detection page, and the IP switching is successful as shown in the figure below.
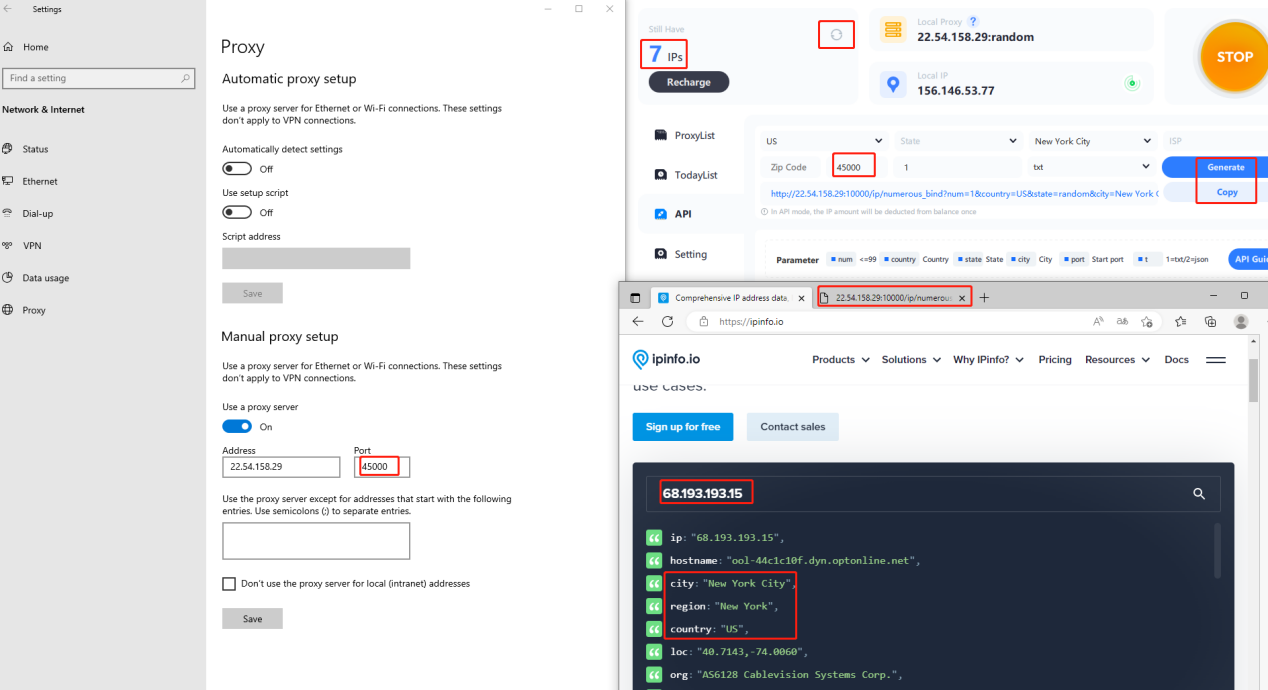
Step 3: Refresh the API link page to automatically bind a new proxy
First turn off the manual button of the internet proxy, and then refresh the API page. When the page loads successfully, a new set of IP proxy will be generated immediately. Click the IP balance refresh button of IP2, and find that (1) IP has been deducted, and then open the internet proxy. Turn on the manual button, click save. Then refresh the IP detection page and find that the IP has been successfully changed again. At this time, the interface is as shown below.
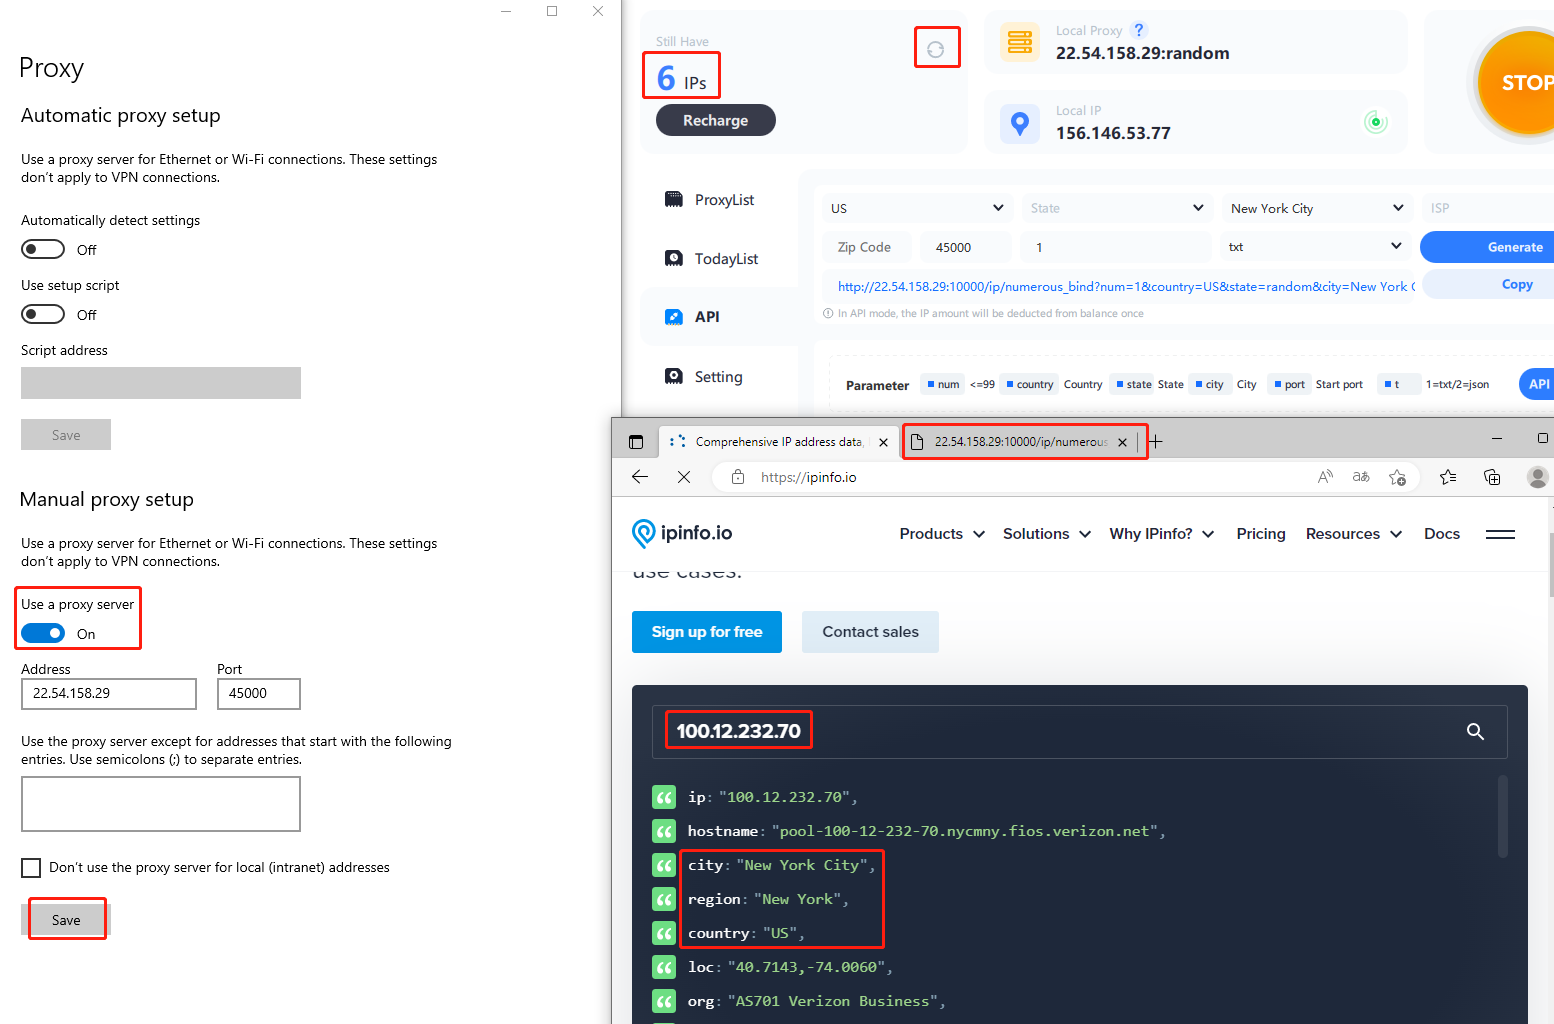
2.Apply API link to a third-party software(Example:fingerprint browsers)
Now we apply the API link to a third-party software, such as bitbrowser (other fingerprint browsers are used similarly). Close the internet proxy, open bitbrowser, create a new window, and enter a window name at will (the name cannot be empty)
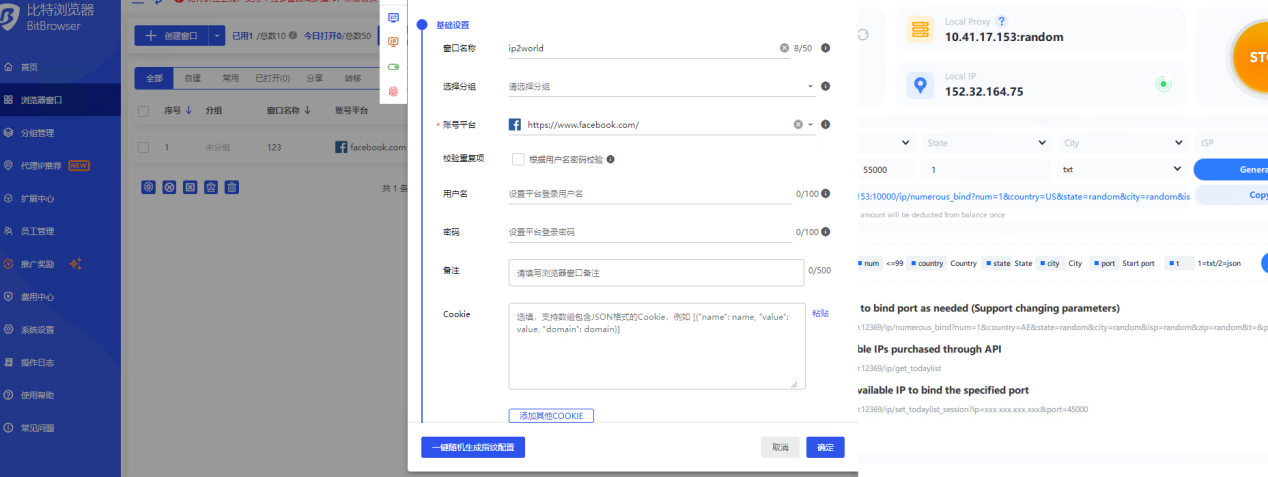
Come to the proxy settings, select "Use the proxy IP platform API link to extract", the service provider selects general, the proxy protocol SOCKS5, paste the API link to the extraction link, and test the extraction (at this time, make sure to enter 1 in the input box of the IP2's API , this test will also consume an IP, so it is not recommended to test), you will find that a proxy is generated
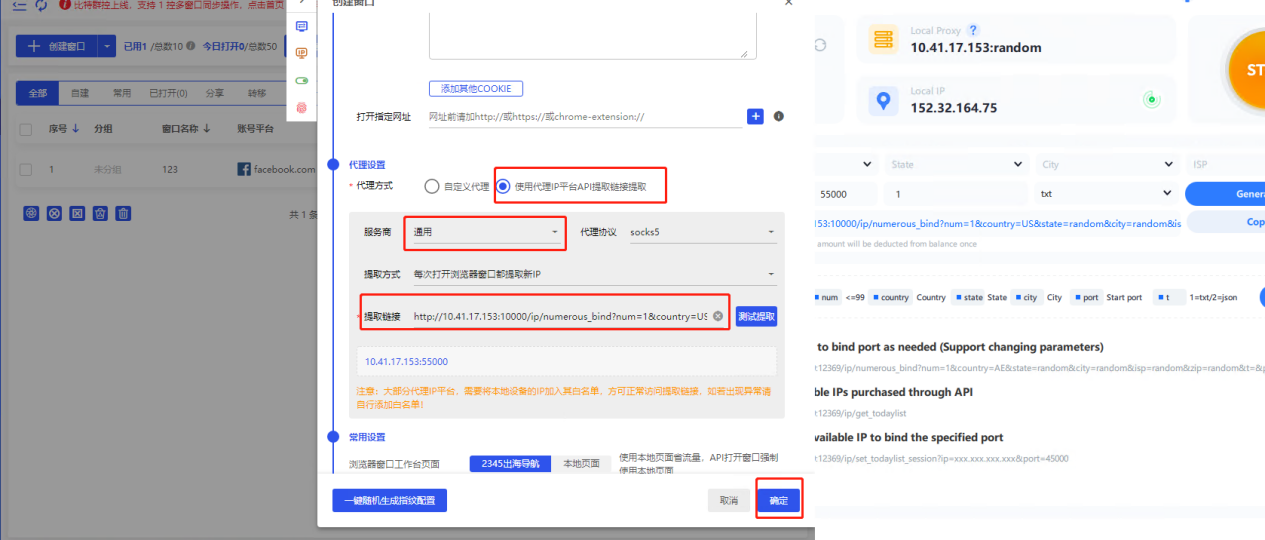
Click OK in the lower right corner, and then click Open
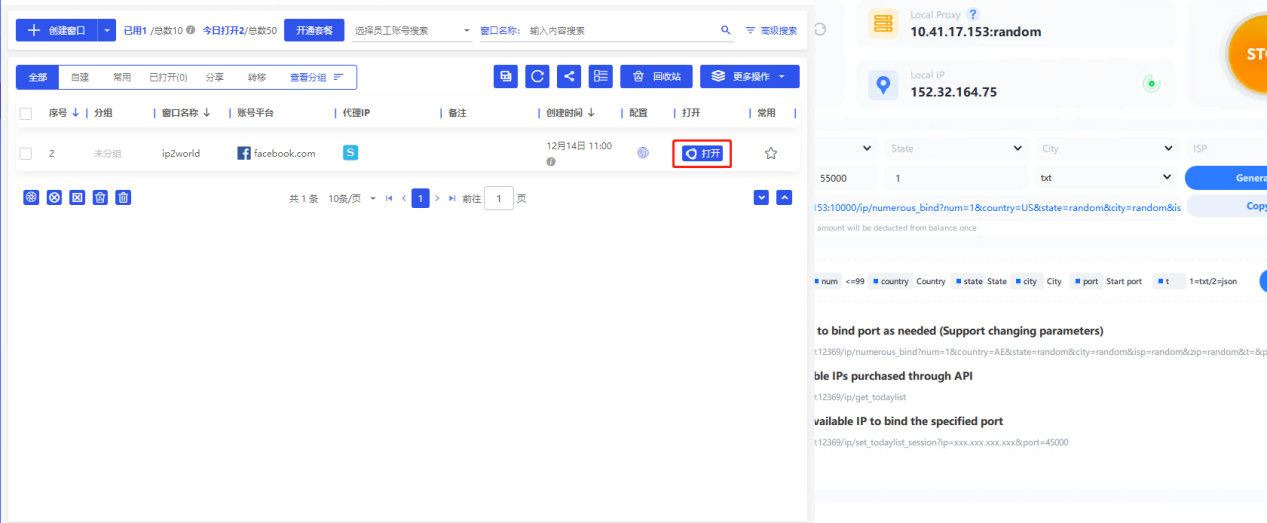
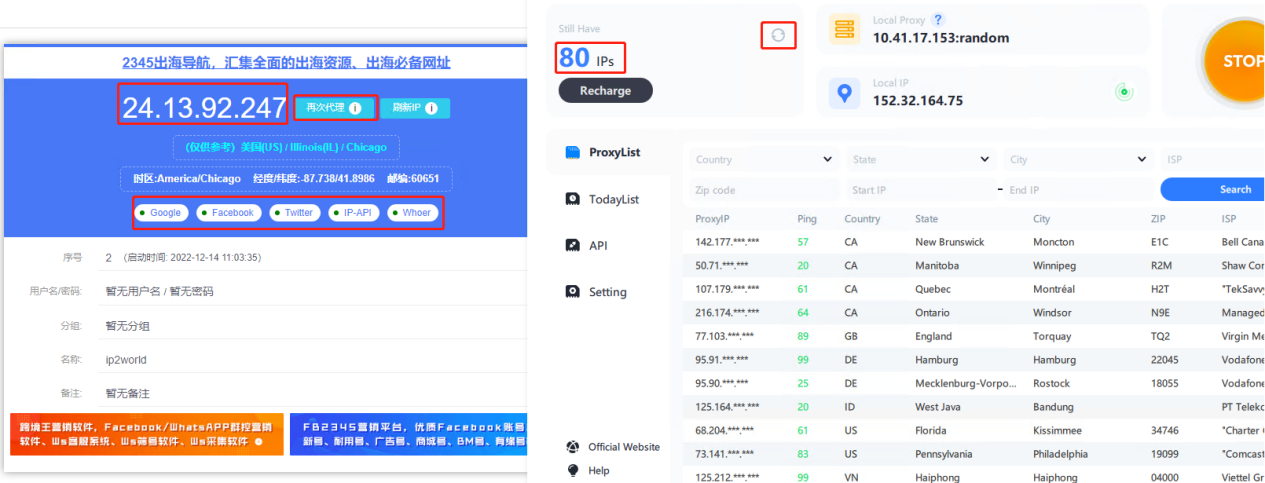
After the proxy is successful, as shown in the figure below, refresh the IP number at this time, and you can see the IP balance
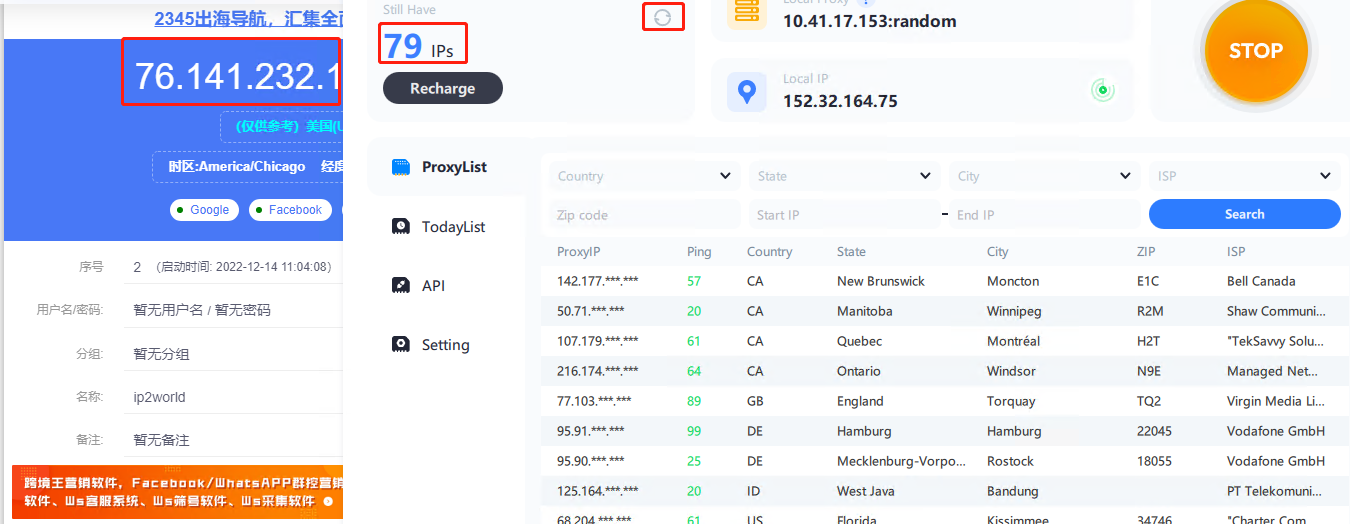
Click Proxy again, and refresh the balance, and found that one IP has been deducted, now you can work on your projects
3.Modify parameters
Currently, you can use the following method to obtain the IP that the API has bound and specify the port to rebind


Other forms of modifying parameters:
22.54.158.29(example) is your PC's IPv4
Random select from the whole proxy pool
http://22.54.158.29:10000/ip/numerous_bind?num=1&country=random&state=random&city=random&isp=random&zip=random&t=txt&port=45000
Set the start port as 45100
http://22.54.158.29:10000/ip/numerous_bind?num=1&country=random&state=random&city=random&isp=random&zip=random&t=txt&port=45100
Select a random proxy from US, State: New York, City: New York City
http://22.54.158.29:10000/ip/numerous_bind?num=1&country=US&state=New%20York&city=New%20York%20City&isp=random&zip=random&t=txt&port=55000


